Friday, March 29, 2013

Marie Jarrell; Fruit Bowl; Due Tues. 4-2-2013

Description:
For 
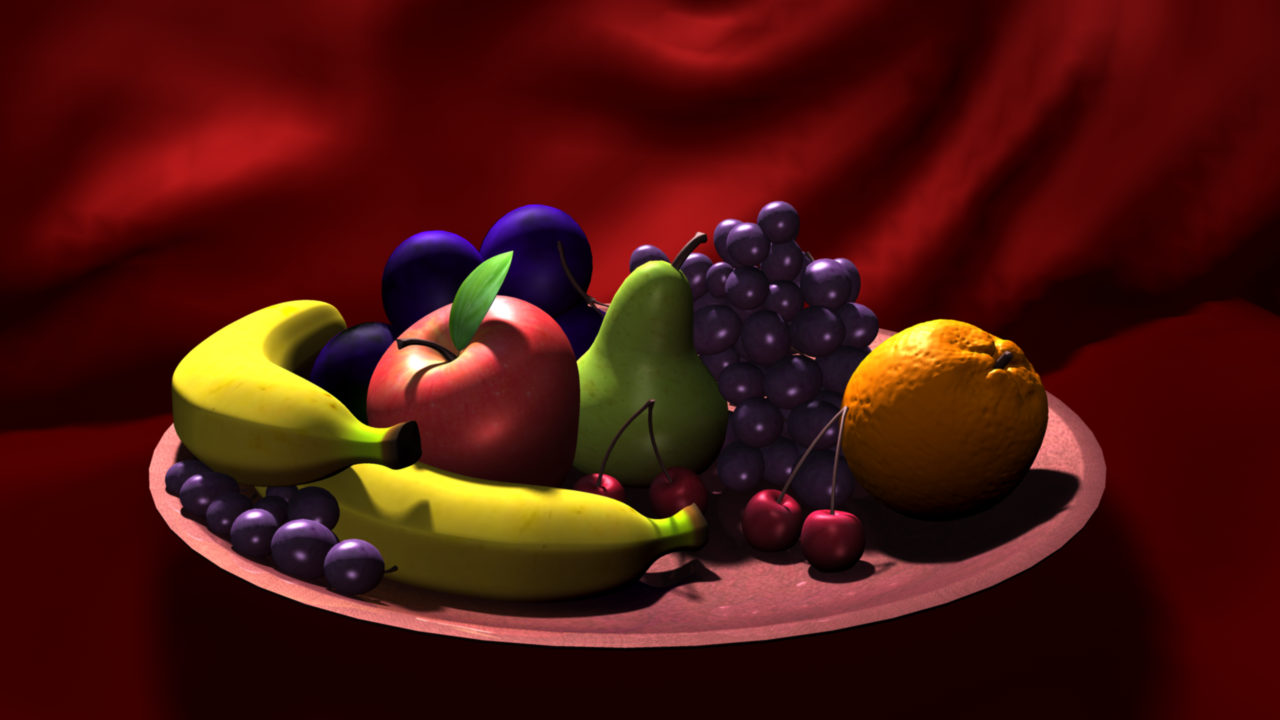
this assignment we textured the "Challenge #1: Fruit Bowl" scene from the 3Drender.com challenge website (http://www.3drender.com/challenges/). Concentrating on texturing the scene using techniques that would result in realistic and interesting shading and texturing. Also, we were to implement good lighting for the objects in the scene.

Problems and Solutions:
The biggest problems I faced were all based around lighting, either giving the fruits definition through lighting or dealing with shadows. For example, while working on the orange I had to find a way of lighting it and revealing the shape and dimensions of the fruit without disconnecting it from the plate. The orange required several special lights to create shadows and bounce back light from the plate to keep it from being too dark.

Working with file textures didn't cause me too much pain as I was able to use several techniques from class such as using layered shaders, and editing UVs to get the textures and gradations I wanted. However, there was a constant struggle to get these textures to work with the shader type, and lighting to remove the fruits original metallic appearance. I was able to do this really well with the bananas, but once again the orange, and even the grapes turned out to be really difficult to work with. For the orange I tried to solve this with the lights and for the grapes I experimented with the attributes and tried to use translucency to get a more organic looking piece of fruit.


Research Images: 


 Texture Images: 


Progress Images:


Final Image Draft 1: 


Final Image: 


Monday, March 4, 2013

Marie Jarrell; Architectural Lighting; Due Tues. 3-5-2013

Description:
For this assignment we textured the "Challenge #17: Natural History" scene from the 3Drender.com challenge website (http://www.3drender.com/challenges/). Concentrating on creating a realistic environment, using lighting methods discussed in class.


Problems and Solutions:
This was a large disorganized file, every stair step, colum, block or decoration was its own geometry and the overall size of the file made work slow and prone to crashing. I first had to spend a great deal of time grouping and combining items, deleting items that were not visible in my scene, and generally just trying to decrease the file size.

Still no matter what I did I could not load texture files on anything but my own laptop. The walls and columns of the museum refused to load texture files no matter what I did. So, I simply used the texture supplied by the file and manipulated the attributes of that texture.

Finally for the floor, I liked the texture but was seeing some pixelation in my renders. 
To fix this I increased the number of pixels in the image  and the resolution of the file.


Research Images: 


Texture Images: 
Bone                                                                                                          Flooring


Display Texture                                                                              Display Texture Bump map


Progress Images: 


Final Image 1st Draft: 


Final Image: 


Saturday, February 2, 2013

Advanced Raytracer


Description:
For this project, we extended the intermediate ray tracer implemented for Project 2.
My ray tracer includes: reflection, refraction, and anti-aliasing via super-sampling.


Creative Images: 


Tuesday, January 29, 2013

Intermediate Raytracer Sample and Creative


Overview

For this project, you will write will extend the basic ray tracer implemented for Project 1. Features of this ray tracer include: planes, boxes, checkerboard pattern, light attenuation, shadows, and multiple light sources.

Your ray tracer should fulfill the following requirements:
– planes (with checkerboard pattern)
– boxes
– light attenuation – light loses power as distance grows
– shadows
– multiple light sources

Your ray tracer must produce the sample image and another image of your design.


Notes on my Raytracer

For this Project I had no trouble creating the multiple objects. Though getting the checkered pattern on the board did cause me some initial trouble this was solved once I realized I was incorrectly using the camera origin point for my calculations when I could have been using the intersection point. The extra lights didn't cause to much trouble either.

Most of the problem solving I had to do actually came from my Creative image. Here I wanted to play around with several planes and really create and illusion of depth. I got to experiment with various object and light placement and see what sort of problems different arrangements created. Perhaps one of the most obvious things I discovered was that since I was creating an image on a 3D plane I didn't have to resize objects to make them to look further away I simply had to push back in space.

Thursday, January 24, 2013

Basic Raytracer


Here is the image generate by my first Ray tracer. It includes ambient, diffuse, and specular light.